
What you'll need:
- Photoshop (any version)
- a photo
- a texture image
1. Open an image in Photoshop.

2. Duplicate the background layer (CTRL+J).

3. Open your image of the paper texture. In this tutorial, i am using this image:

5. Click and drag the texture image to the previous photo opened. Position the texture layer (Layer 2) in between the background layer and Layer 1.

6. Click Layer 1 (the duplicate of the background layer) and set the blending mode to Multiply. Then, set the layer opacity to 80%.

7. The texture is now visible. It will depend on the texture you choose if you need further adjustments after the previous step. The texture I'm using here looks a bit too strong and distracting to the image so to make it a bit more subtle, click on the texture layer and set its opacity to 70% or to any percentage you want.

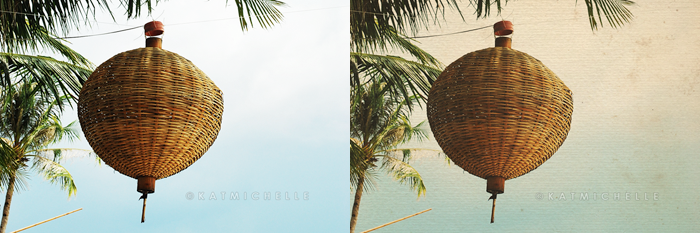
**Note that some texture images might come in different colors. Here, I used a texture that is yellowish-brown so those affected the final image which appears warmer compared to the original. If you don't want this effect, you can choose to remove the color from the texture and convert that layer to black and white (CTRL+Shift+U).
This is how it will look like:

8. Flatten the image and save it.
BEFORE and AFTER:


No comments
Leave a comment: